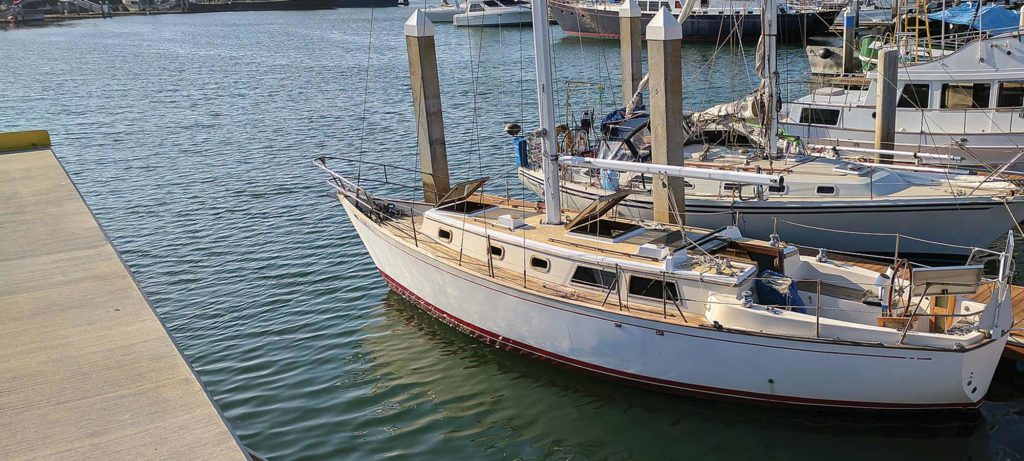
We’ve all heard of the “iron triangle” in some form or another, and it goes something like “Fast, good or cheap. Pick two.” The same can be applied to boats if you equate fast with “ready to go sailing” and good with “aesthetically pleasing.” Cheap is cheap. When my husband, Rob, and I went looking for a boat, we set our sights on “ready to go” and cheap. Some might think that won’t get you much of a boat, but we ended up with a 36-foot cruising boat designed to cross oceans. The only problem was it wasn’t quite ready to go or aesthetically pleasing. It sure was cheap, though. At $6,000, it was just over a third of our very firm $15,000 budget for this project, which we hoped would take six months.After kissing a lot of frogs, we stumbled across a relatively unknown boat with an impressive pedigree. Only a handful of C&L Marine 36s — designed by the late, great Doug Peterson — were ever launched. Laid up in Taiwan and finished in California in the late ’70s and early ’80s, this boat was designed and built with offshore voyaging in mind.
We discovered Connie Gay languishing in a storage-unit parking lot in Oxnard, California, surrounded by RVs and ski boats and 5 miles from the nearest body of water. Nestled up against a fence separating the lot from the municipal airport, she’d sat under the flight path of innumerable planes, jets and helicopters for seven long years.
As we learned from the manager, Connie Gay had changed hands five times since she arrived in 2009. No one remembered who’d originally brought her to the yard, but the latest owner had bought her a year earlier from a young couple who’d owned her for a year, and so on.
Five different people had bought what they thought was their dream boat, but which had turned into an albatross they couldn’t wait to pawn off on someone else. So what made us think we could succeed where so many had failed? Two reasons: 1) They picked the wrong boat, and 2) we saw what they didn’t.
The latest owner, a man with big dreams and little experience, had bought Connie Gay with the understanding she was ready to go sailing. She wasn’t. He’d picked the wrong boat for his dream of immediate coastal cruising and daysailing. He wanted to learn how to sail a boat, not how to rebuild one. With the money from the sale, along with some consultation from us, he ended up buying the right boat and is out sailing the Southern California coast today.
“Where some saw a derelict that would never see the ocean again, we saw a solidly built classic with much more going for her than not.”
We were looking for an inexpensive project that would ultimately be capable of taking two people across oceans. There was no wiggle room in our budget (cheap), so our plan was to find a boat that was ready to go (fast) but ugly, or one that was cosmetically attractive (good) but wasn’t ocean-worthy. The only thing Connie Gay had going for her was her price tag, but after a more thorough look, we couldn’t help wondering if we might be able to manage all three.
Where some saw a derelict that would never see the ocean again, we saw a solidly built classic with more going for it than not: an encapsulated keel so we won’t have to worry about leaking keel bolts in the middle of the ocean; a high-quality LeFiell keel-stepped aluminum mast; cast-bronze portlights that will never crack in the tropical sun; a rudder hung on two big bronze bearings and protected by a half skeg; a popular Volvo diesel engine with readily available parts and expertise; tankage for crossing an ocean; a real teak-and-holly timber sole that will never wear out; a top-notch designer; and a hull so thick it will survive until the end of time.
As we sat on grungy ’70s-era orange tweed cushions and looked around our new boat, Rob and I realized she deserved more than a “fluff and buff.” She deserved a full “West Coast refit” — even though that would end up extending our timeline by three months, and meant the remainder of our budget would be spent on deferred maintenance and repairs rather than new sails and fancy electronics.
The Engine
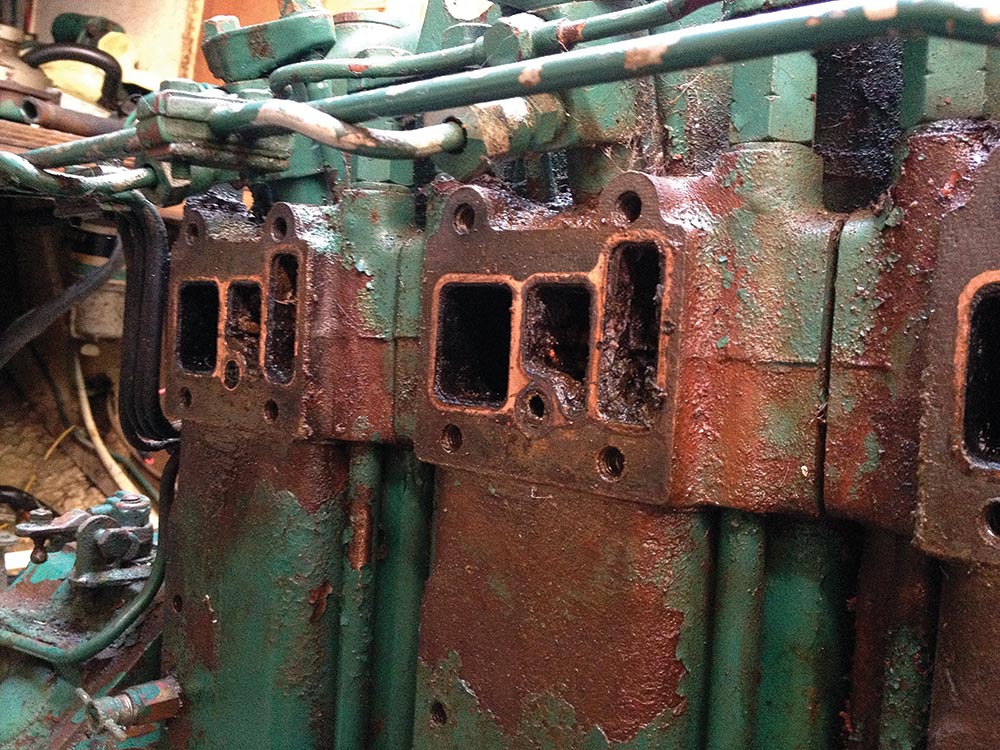
Plenty of better sailors than us have sailed around the world on engineless boats, but we prefer a dependable engine that starts every time. Although the old Volvo MD17C looked as if it had been rode hard and put away wet, its big flywheel turned over freely, indicating it wasn’t seized. If it had been, we would’ve walked away.
Armed with a good repair manual and years of experience fiddling with old diesels, Rob sought the counsel of our friend Bill Burdette, a master mechanic who works for List Marine, one of San Francisco Bay’s leading marine engine shops. Bill advised us to focus on the four major systems of any diesel engine: drivetrain, lubrication, cooling and fuel.
The first thing we did was check the compression. Using a compression tester, we found all three cylinders to have high, equal pressure, which showed the drivetrain was in good shape. One thing off the list.
Then we moved on to the lubrication system. We needed to make sure the oil was getting to all the nooks and crannies it needed to. After opening the compression levers, we turned the engine over, using the starter. With the engine free-spinning, we were able to see oil squirting on all the appropriate places. Two down, two to go.
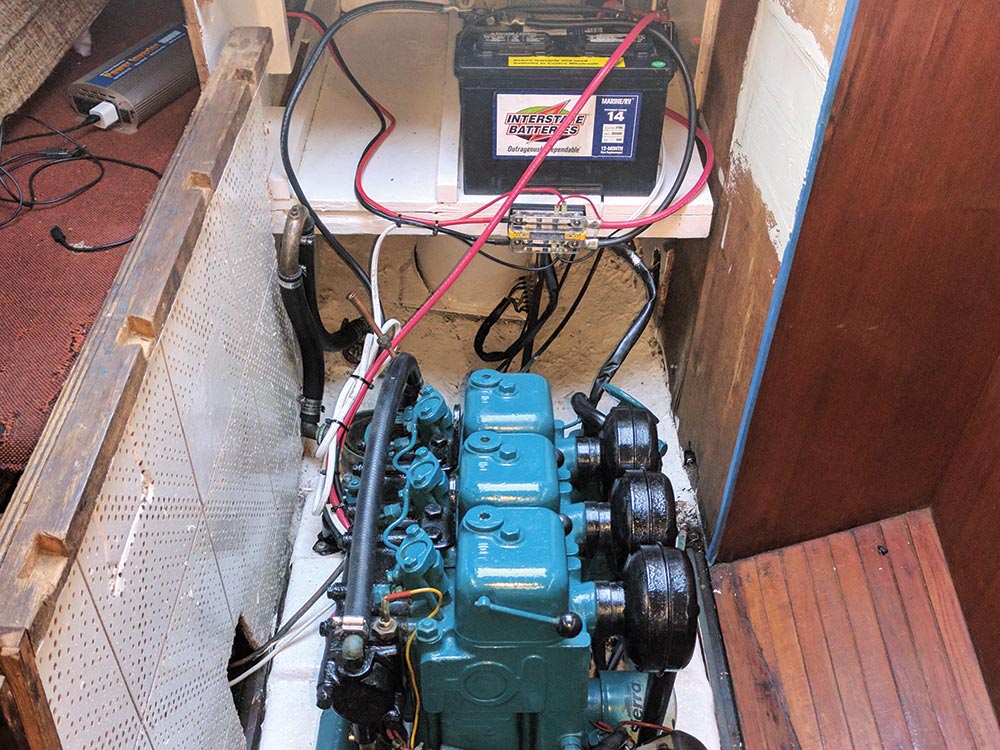
Feeling rather cocky with our success so far, we dived right into the cooling system. That’s when we found Surprise No. 1.
Our Volvo is raw-water cooled, meaning its cooling system uses the water the boat sits in. In Southern California, that means salt water.
Raw-water-cooled engines can be quite long-lived and dependable — as long as you don’t leave salt water in them.
If the engine isn’t going to be run for a week or longer, it’s vital to replace the salt water with a mix of fresh water and a product called Salt-Away. For long-term lay-ups, draining completely and “fogging” the cylinders with manufacturer-recommended oil would be the way to go. This prevents devastating corrosion, such as what we discovered on our transmission.
One of Connie Gay’s many previous owners had dutifully opened the three drains on the engine, but he forgot to drain the transmission. The salt water sat inside for years, turning a perfectly good piece of equipment into a cracked hunk of rust.
Faced with the unexpected expense — both in time and money — of replacing the transmission, we turned to Facebook. Within three minutes of posting photos of the useless reduction gear, a friend offered up one he’d just removed from his boat. Instead of gobbling up our budget on a new transmission, which could have easily cost $3,500 or more, we spent only $300. Now we just had to swap out the old one for the new one.
The transmission was attached to the engine with four bolts, two of which were completely inaccessible. To reach them, the engine would have to be lifted off its beds and spun 180 degrees. We stood there scratching our heads, wondering how to accomplish that and still stay within our strict budget. Following our mandate to do as much work as possible ourselves and use what we had on hand, Rob channeled his inner MacGyver.
Over the next half-hour, he assembled his supplies to create a DIY engine hoist: A scrap of two-by-four, two Dyneema strops, four Dyneema soft shackles and the boat’s 4-to-1 mainsheet system. The final piece of the puzzle was a CQR anchor.
The CQR sat across the companionway, directly over the engine, with the two-by-four under it to protect the wood. We hoped that if the anchor were strong enough to hold a boat, it would be strong enough to hold the weight of the engine. Hooking up the Volvo to the anchor using the 4-to-1 and Dyneema was a simple matter, and then we were ready to roll.
Bracing ourselves, we grabbed the mainsheet and sat back, using our collective body weight to raise the engine off its beds. Only then did we realize our mistake: Neither of us would be able to hold the engine on our own if the other let go to turn it around.
Legal disclaimer: Kids, don’t try this at home.
Without a third person to help, Rob decided the only course of action would be to use some fancy footwork. As the engine dangled in the air, he very carefully prodded it with his foot several times until it was in position. Using the toe of his shoe, he held it in place as we lowered it back down. It sounds scary, but in reality, no body parts were ever at risk of being severed. The entire operation took all of 15 minutes.
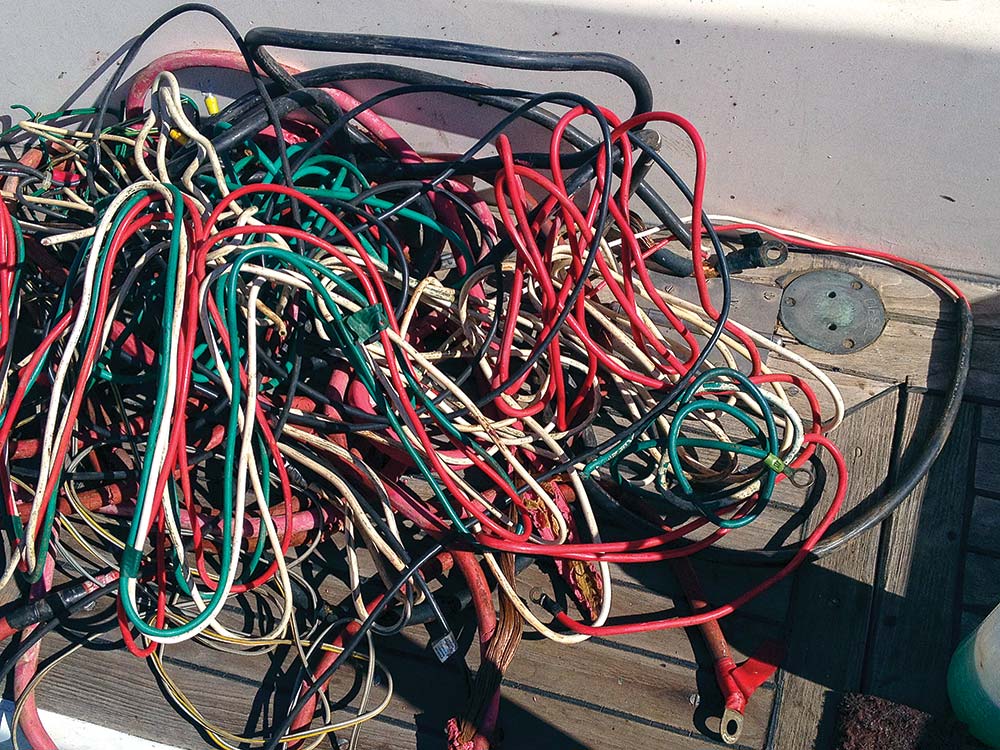
The rest of the engine rehab went about as smoothly as we could hope for, with only one small hiccup. The head of one transmission bolt was hopelessly stripped, so we had to drill into it and use a device called an E-Z Out to extract the remains of the bolt. From that point on, it was a simple matter of removing the exhaust manifold, cleaning out the water channels, replacing all hoses and the through-hull, and rebuilding the water pump.
Moving on to the fuel system, we pulled the injectors to find them in nearly new condition. The timing of the high-pressure pump was also perfect, leading us to believe the engine had accumulated very few hours before Connie Gay became a landlubber.
All that remained was to replace the hoses and fuel filters before we crossed our fingers and did a quick test run. The sweet baritone thumping of a perfectly running Volvo reassured us that we were one step closer to “ready to go.”
The Interior
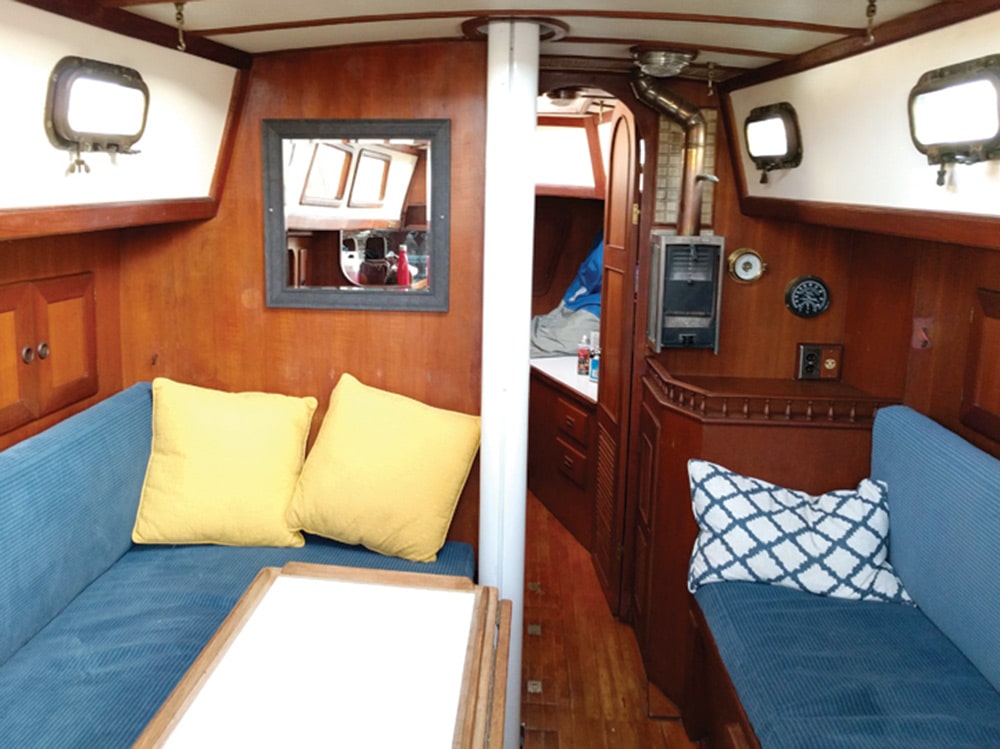
The true heart of any cruising boat is the interior. It’s where you cook your meals, take shelter during storms, plan out your sailing trips and entertain friends — it’s where you live. We hate camping and enjoy entertaining, so for us, a comfortable and attractive interior is a priority.
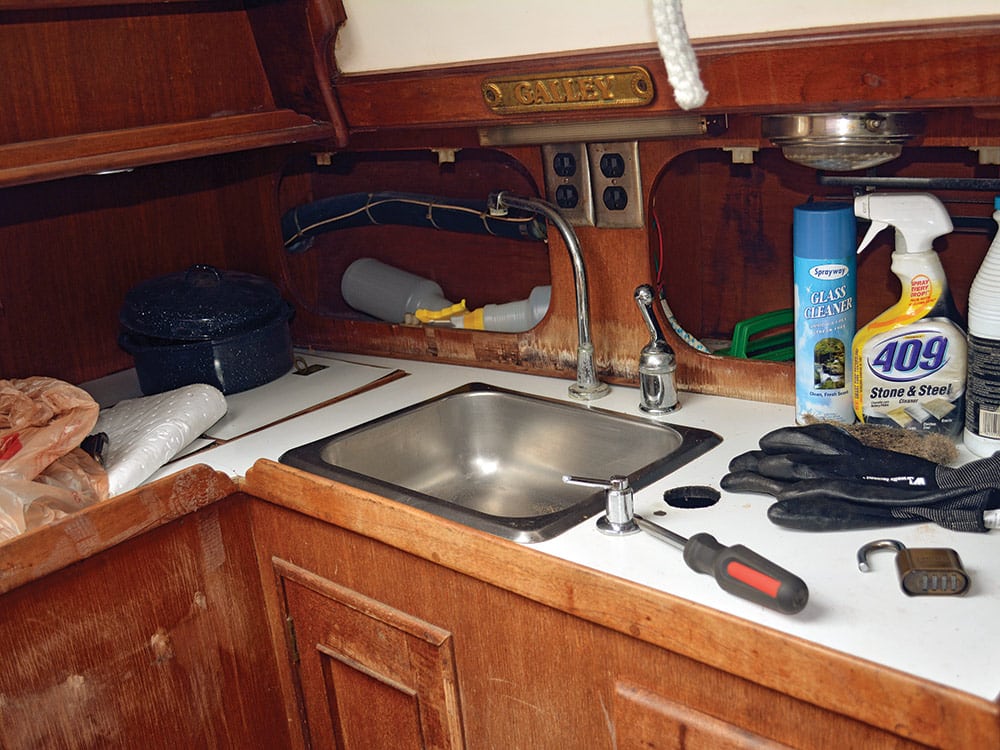
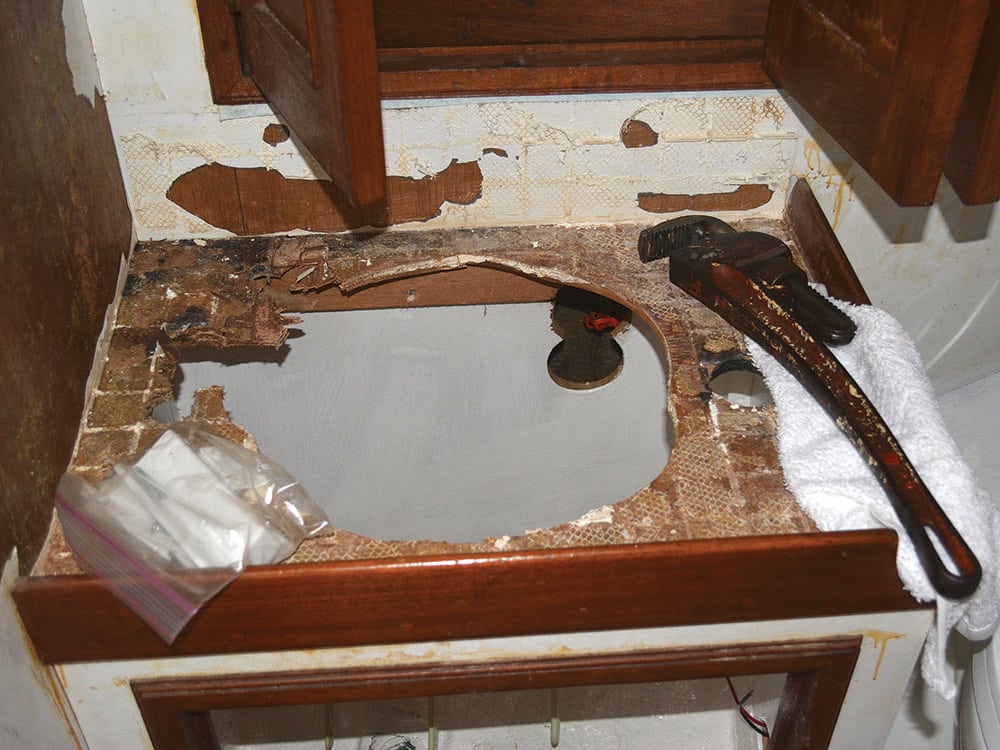
Happily, Connie Gay’s teak interior was in relatively good shape. Long-term leaks had rotted the sink area in the head and a cabinet in the galley, but the rest of the boat would only need a little paint and wood care to shine. The last owner had left behind hundreds of dollars worth of supplies — interior paint, bottom paint, brushes, rollers, solvents and so on — so we managed to spend very little on sprucing up the living space.
Wanting to keep our chore list — and so our shopping list — to a minimum, I sketched out a plan of action. The inside of the coachroof needed a couple of coats of enamel paint; all teak surfaces would be treated with Howard Restor-A-Finish to smooth out the years’ worth of splotchy oil applications; the engine cover and steps would receive several coats of varnish to protect them from the elements; the overhead only needed a good scrubbing; and the disintegrated vinyl hull liner would be replaced with inexpensive indoor/outdoor carpet.
We hate camping and enjoy entertaining, so for us, a comfortable and attractive interior is a priority. Happily, Connie Gay’s cabin was in relatively good shape.
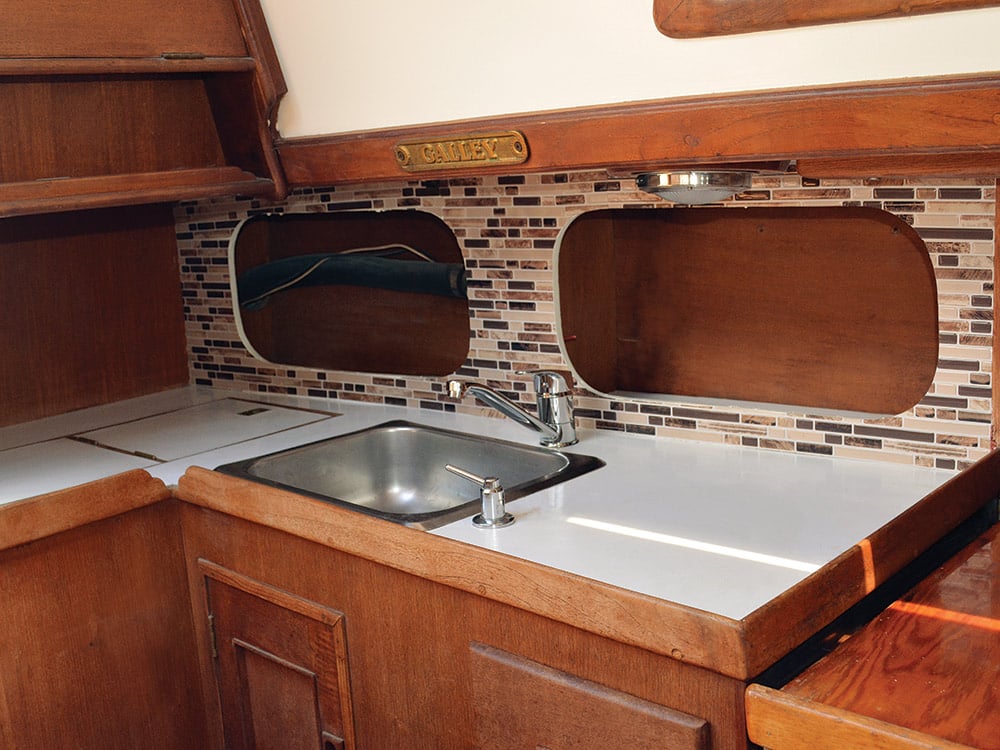
Without access to a workshop, we didn’t want to rebuild anything from scratch. To repair the rot in the galley, we strengthened the wood by simply drilling some holes and injecting epoxy. The teak veneer was in bad shape, though. Instead of going to the trouble of fairing and painting the cabinet, we covered the entire thing with adhesive vinyl tiles. Constructing a new cabinet might have been more attractive, but it also would have cost significantly more than the $12 we spent on the vinyl.
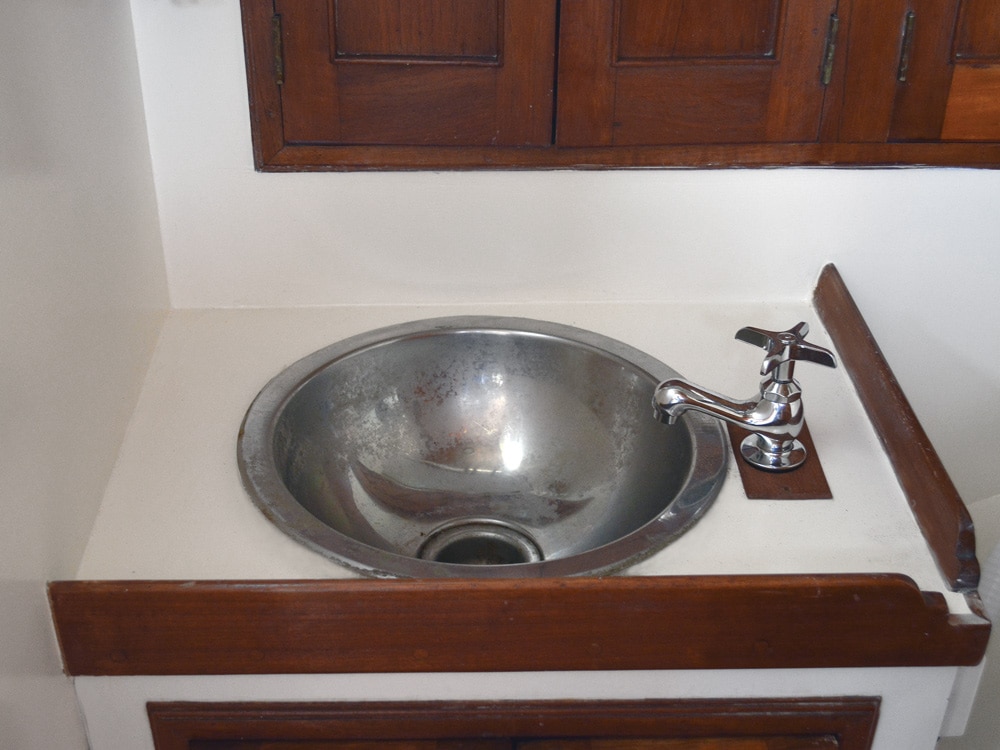
The head rot was handled similarly. We dug out and cut away as much rot as possible, then coated it all with epoxy and filled the gaping wounds with filler-thickened resin. After sanding the surface, we painted it, along with most of the flat surfaces in the head.
The only interior project left was to replace the old tweed upholstery. We were surprised to find the foam in good condition, so we called our canvas guy for a quote to recover five cushions. When he told us $150 each, we booked him. Then Juan came to pick up the old cushions and we were hit with Surprise No. 2.
 |
Subscribe Now and Save 50% |
Due to a lack of communication on our end, his quote had been for small cushions, not 6-foot-long jobs. We managed to whittle down the final bill by choosing a roll of upholstery that had been sitting on his shelves for 20 years, but we still spent twice as much as we’d planned. Worth it, but … ouch.
The Topside
Those familiar with one of Doug Peterson’s best-known cruising designs, the Kelly Peterson 44, will see the family resemblance — high bulwarks, coffin-style house and a similar underbody. Simply put, the C&L 36 is a shorter, aft-cockpit version of her bigger, more famous sister.
Connie Gay's classic lines would make any old salt's heart thump just a little faster. But one look at her decks would put them into cardiac arrest. After so many years of neglect in the brutal Southern California sun, they were the most time-consuming part of the project.
The kitty-litter nonskid laid down by some unknown sadist had since partially flaked off, taking gelcoat with it in spots. Naturally, most of it remained stubbornly cemented in place, leaving an uneven patchwork surface.
As we quickly discovered, there isn’t a sandpaper in existence that could even touch that mess of a deck. Not even hardcore chemical stripper smuggled into environmentally rigid Ventura County could crack that shell.
As we walked around the cabin top, contemplating the horror of grinding off all the kitty litter, we discovered Surprise No. 3. The one or two small soft spots we’d known about turned out to be four or five. And they weren’t nearly as small as we’d originally thought.
The 6- to 8-inch soft spots weren’t voids, as we’d feared, but rather delamination. The fix was simple: Drill a farm of holes across the entire soft spot and use a syringe to inject polyester resin until it oozes out of every hole.
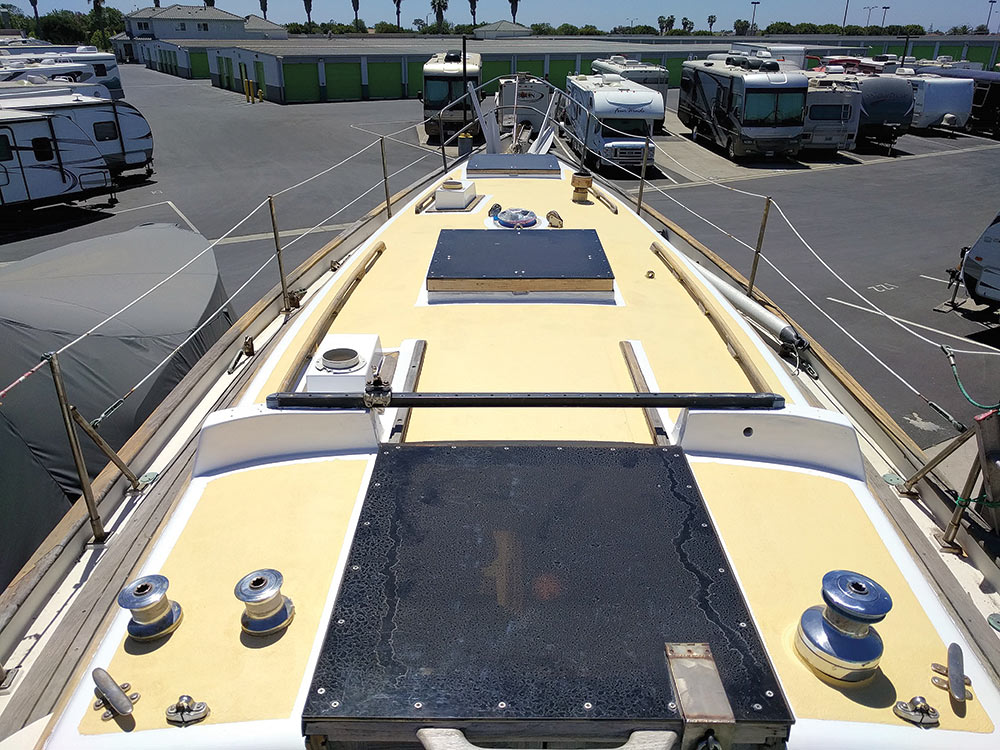
Throughout this entire project, we’d only experienced a single moment of real fear. Rob was absent-mindedly filling yet another section of delamination when he realized with a start that he’d injected 6 ounces of resin in the area, and it was thirsty for more. We’ve seen this movie before, so he came tearing down below, where I was working, to search for drips into the cabin. Fortunately, there were none — he’d just stumbled on a particularly large soft spot.
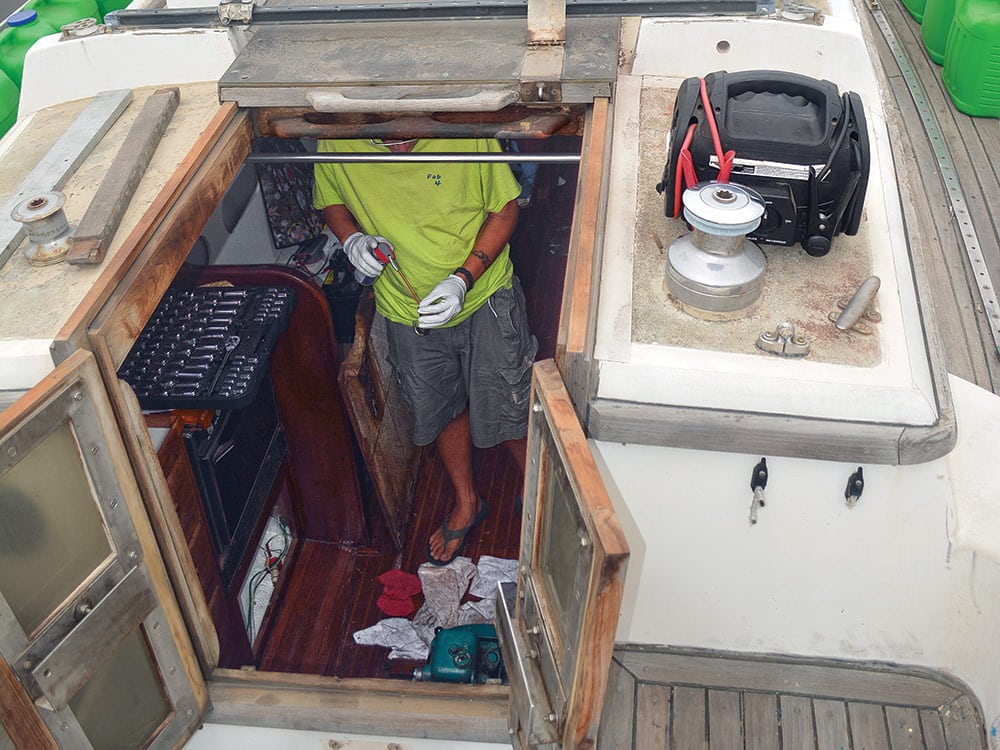
After all the holes were filled, we weighed our options for fixing the litter-skid. Grinding it all off would have required waiting until the boat was in a proper boatyard, and quite honestly, we were tired of looking at the deck. In the end, we used West Marine’s Marine Structural Filler to “bondo” the nonskid into submission.
It’s not perfect, but it is structurally sound, and after painting with a couple of cans of Interlux Interdeck we picked up at a marine swap meet for $10 each, the cabin top looks downright “good.”
Everything Else
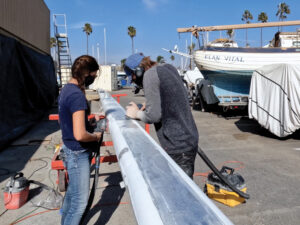
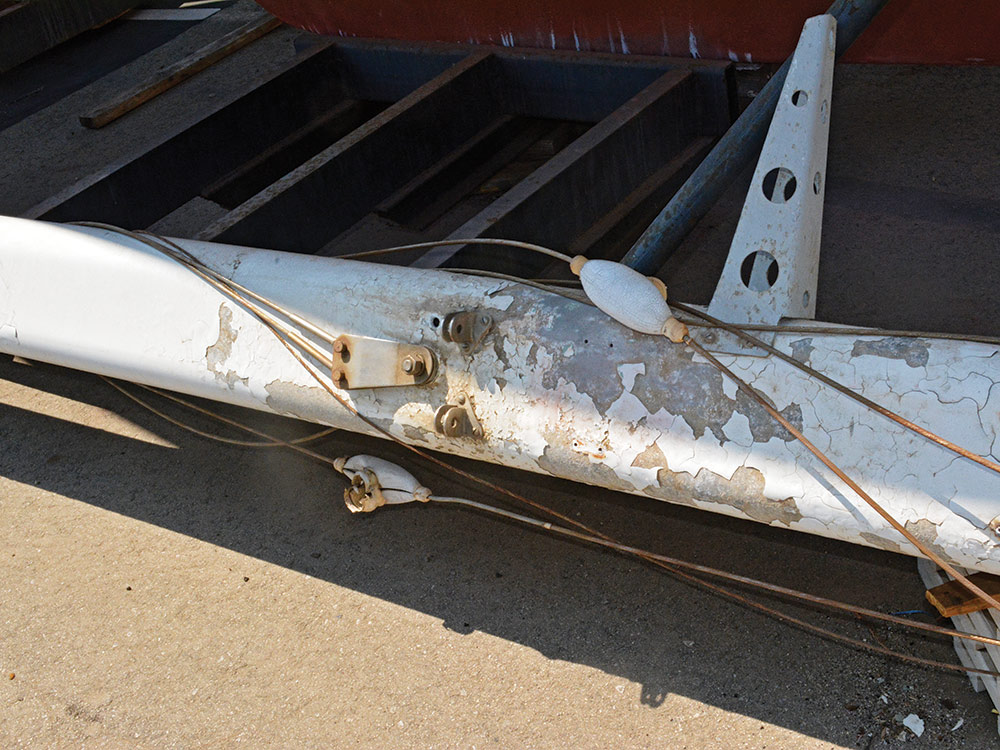
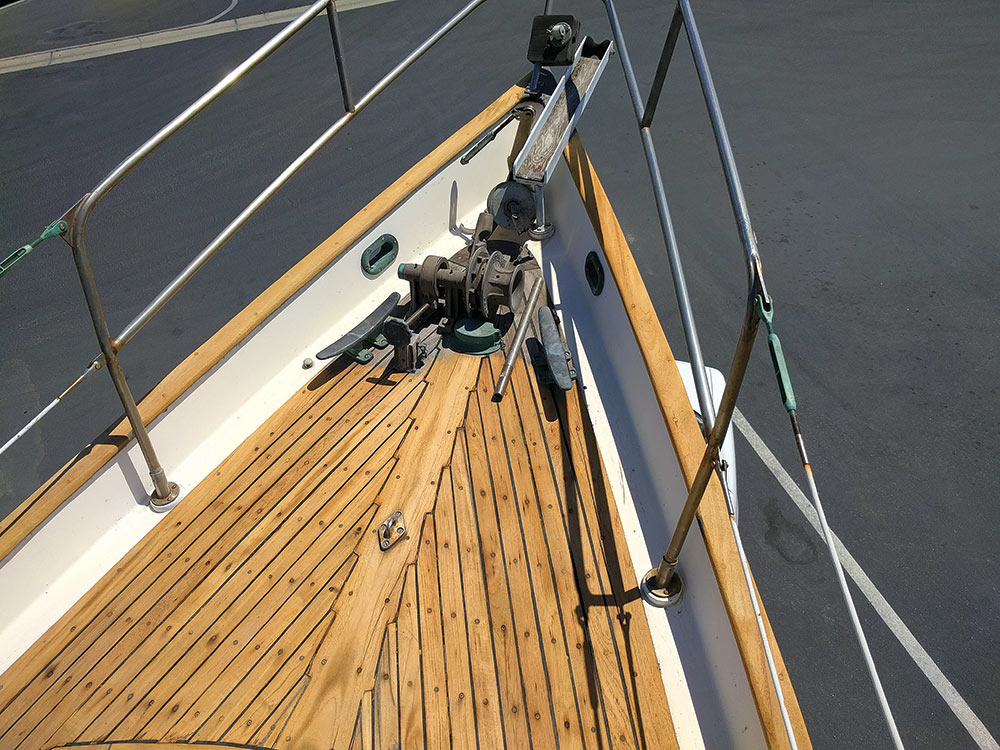
Of course, so much more went into this refit. Here’s just a handful of our other projects: all plumbing and hoses replaced; rudder bearing greased and gland repacked; all through-hulls and valves replaced; mast stripped and painted; standing rigging inspected and cleaned; teak side decks rehabbed; three hatches rebuilt and new Plexiglas installed in four deadlights; new electrical system and solar panels; new electronics; and new running rigging.
We’d rather go sailing than spend sunny weekends folded into an engine room. this boat was meant to be used, and we never forgot that.
By anyone's standards, that's a lot to do in nine months. It would have been easy to spend years turning Connie Gay into a marina queen, so I made up a motivational sign and taped it to the main bulkhead: "Progress NOT Perfection!" And that's how we looked at this entire refit.

We like being able to cut up fish in the cockpit without worrying we’ll scratch the gelcoat. If we “dock by Braille,” we don’t want to fret over scratches. We’d rather go sailing than spend sunny weekends folded into an engine room. This boat was meant to be used, and we never forgot that.
When all was said and done, we think we managed to wrestle this former derelict into the full iron triangle — if you don’t look too close. She may not be the prettiest girl at the dance, but she’s having the most fun.
How We Stayed Within Budget
We kept the boat at the storage lot to do most of the work instead of taking it to a boatyard, saving us thousands over the course of nine months.
The lot had no water or power, so we immediately rigged a solar charging system and inverter, which powered all of our tools.
For water, we filled spare jugs off-site and hauled them up with a rope.
The boat came with about $1,000 worth of supplies, and we raided our own stores for as much as possible.
We found a set of tape-drive sails for a Catalina 36 in the boat, but they were too large. We sold them for $2,000 and bought good-quality used sails from Minney’s Yacht Surplus.
A 1,000-foot roll of yacht braid came with the boat, as did fenders, dock lines, anchors and much more.
We hired out only one job: the upholstery.
Expenses:
- Boat: $6,000
- Storage: $1,800
- Sails: $1,000
- Upholstery: $1,500
- Engine rehab: $1,000
- Transmission: $300
- Plexiglas: $750
- Electrical system: $1,000
- Other supplies: $1,000
- Transport and launch: $2,500
- Minus bonus sails: -$2,000
- Total: $14,850


