In 2020, our friends purchased a 1980 43-foot Hans Christian, Remedy, that had a compromised bowsprit. My husband, Chris, had reinforced it for the previous owner, but it was time to replace it entirely because it was suffering from severe termite damage and was the weakest link of the rig. Chris was asked to tackle the replacement job too, based on his reputation here in Southern California for delivering excellent results, even if it means putting projects aboard our own Cheoy Lee 41, Avocet, on the back burner.
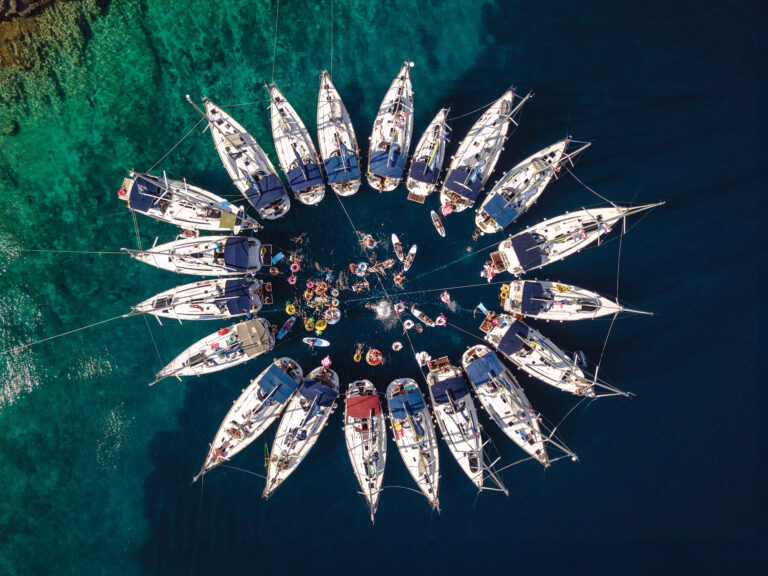
Hans Christians are pretty easy yachts to spot; many of the designs have a substantial bowsprit, carrying the lines of the large bulwarks that make for a stout bluewater cruiser. The rigs differ from ketch, sloop and cutters, but they all get as much sail area as possible, utilizing the bowsprit. For example, the 33-foot Hans Christian has a relatively small footprint on deck but sports the rig and sail area of what you might see on a 40-foot yacht, to compensate for the heavy displacement.
Forty-one-year-old Remedy had never had the bowsprit removed and inspected—hence the termites, along with wood rot at the base, where water pooled easily.
There also was the issue of the samson posts (the physical stopping point for the aft end of the bowsprit) having separated from their lateral support underneath the deck. And we noted a classic case of stainless-steel crevice corrosion that had claimed all of the bowsprit hardware, which had hairline cracks, pitting and bent tangs.
A total rebuild was necessary, and there was a lot to consider about the way to go about it, given how much materials and technology have improved since Remedy splashed decades ago. We could stick with wood and re-create what was there, or make something like a fiberglass bowsprit. Using the old bowsprit as a mold, we could build something that was impervious to rot, and that was stronger and lighter than its wood counterpart. Or we could build one out of aluminum. It wouldn’t sport the exact same design, but it could be better in many ways.
Our friends decided to stick with traditional wood, which led to new considerations. Since materials like old-growth wood are simply not available these days, we couldn’t carve a new bowsprit out of a single piece of timber like the original. Instead, we would have to utilize techniques such as laminating. Having just finished our bulwark aboard Avocet, we knew that we liked cumaru wood (sometimes called Brazilian teak) for its strength, but finding a piece that was a minimum of 8½ feet wide by 14 feet long, and kiln-dried, turned out to be more difficult than we anticipated.
Remedy’s owners found a lead on sapele, a type of mahogany with higher tensile strength than teak and better gluing adhesion. It lacks the oils that teak has for fighting off rot and bugs, but given the general lack of wood on the West Coast, we decided that sapele was our best option.
With the wood ordered, Chris set out to translate measurements from the old bowsprit to paper so that he could dimensionally see how Hans Christian had done it, and where he could improve the design.
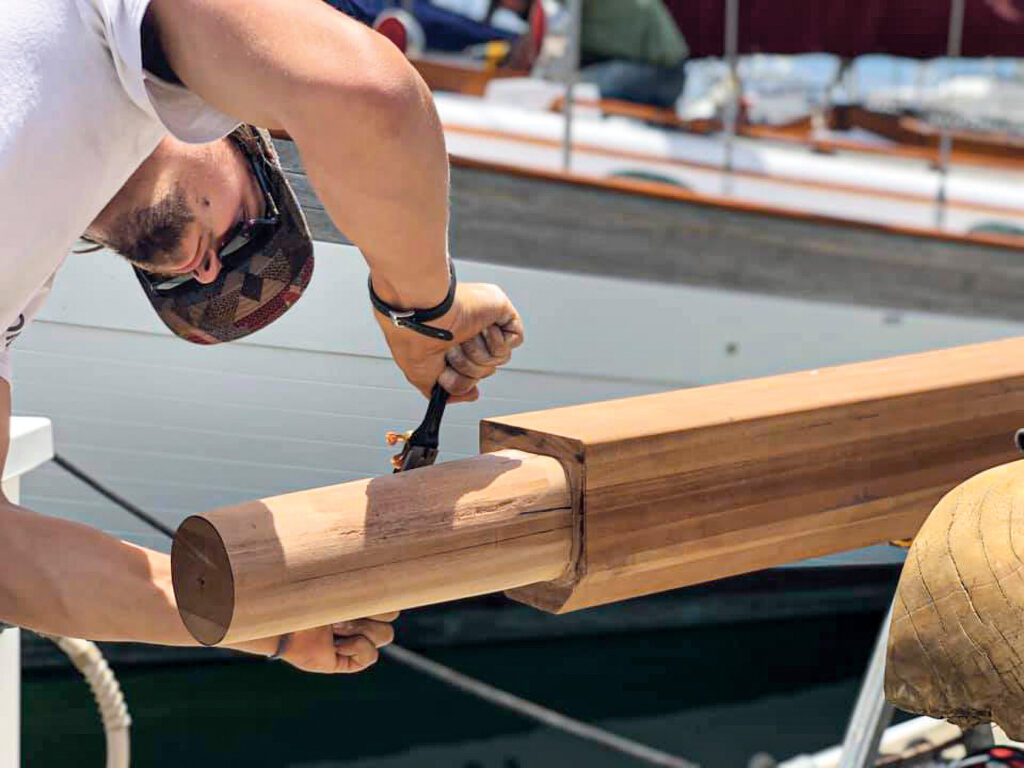
Hans Christian had made the original bowsprit quickly and efficiently, leaving details such as perfectly straight lines, 90-degree cuts and appropriate spacing as an afterthought. Chris added notes where material needed to be added and taken away to create an upgraded version. He then laid out his tools and got busy turning the 5-by-5-foot boards into a bowsprit.
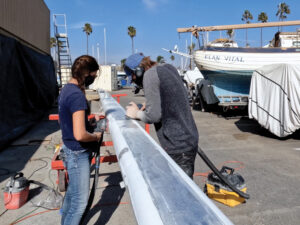
This was a messy project. Not only were we dealing with a large amount of dripping resin, but there was also a fair bit of dust and shavings that wouldn’t be appropriate to manage dockside. Fortunately, our friends at Ventura Harbor Boatyard allowed us to set up shop there. Chris created a workspace encapsulated with a tarp to control the dust and temperature. Inside, we used box fans for air circulation.
From the initial concept, we knew that the hardest part of building the new bowsprit was going to be cutting an 8½-by-8½-foot cube with a taper. So, instead of trying to cut an entire solid piece of timber, Chris instead cut 10 planks into the shape of the bowsprit, with the intention of gluing them together. When he cut the boards, he purposely left about a ¼-inch of extra material on all sides to act as a buffer while gluing everything together, and to allow for enough material to be planed away during the shaping process.
Once the boards were cut into their desired shape, it was time to glue them together.
This process of laminating wood with many layers introduces an incredible amount of tensile strength, if you can keep the layers well-bonded for the life of the beam. There have been horror stories about laminated beams on ships coming apart, but if the job is done properly, the result will be stronger than it could be with a single piece of timber.
After speaking with a few experts about lamination materials, Chris used Smith’s Oak and Teak Epoxy Glue, which turned out to be by far the stickiest, strongest and goopiest epoxy we have ever seen. Chris did a quick run with the orbital sander to raise the grain of the wood, and then a wipe-down with acetone, before he and one of the boat’s owners began applying the glue with a 4-inch filler spreader.
This was among the most stressful parts of the entire project—and not just because we needed it to work. At that time, there was a nationwide epoxy shortage, so we were trying to conserve epoxy at the same time that we were liberally applying it. And we were racing to make sure all the boards were clamped before the epoxy “kicked off” (entered the initial cure phase).
When the last clamp was placed, the old bowsprit was placed on top of the laminated boards for more downward pressure. With the epoxy curing, we draped a tarp over the whole ensemble and plugged in three space heaters to increase the ambient temperature to 95 or 100 degrees Fahrenheit, to assist in the curing process. To be safe, we checked on the heaters continually, and we removed them from our workspace the following day.
Two days later, we removed the clamps to get a good look at what was now one cohesive piece of wood. We were pleased with the results (whew!). It was now time to shape the laminated wood into a proper bowsprit.
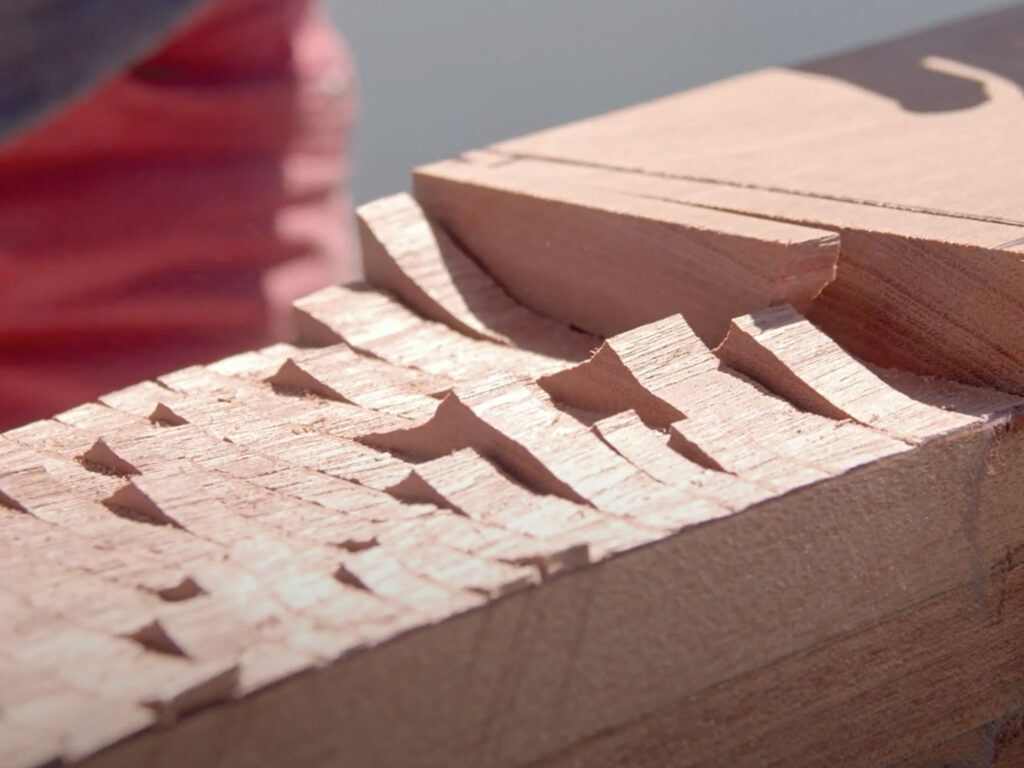
The first tool Chris grabbed was his trusty grinder with a 5-inch sanding-pad attachment, to get rid of all the epoxy that had squeezed out between the boards. This step left a flat surface that was suitable for a hand planer.
Chris struck a centerline and started marking the sides of the bowsprit where the final dimensions would be. The least amount of material he had to remove was about a ¼-inch, and the most was about 4 inches around where the bottom edge of the bowsprit tapered from the middle section up to the very front. This exercise confirmed that his initial cuts in the individual planks were correct, leaving enough material to shape.
After lamination, the bowsprit weighed more than 300 pounds—yikes, indeed—but that figure decreased with every inch of material that Chris shaved away. The final weight was around 270 pounds. This is why a lighter material such as fiberglass, carbon or aluminum would be great to consider.
Once the bowsprit was between ⅛ and ¼ inch of the original spec, we relocated our project to the dock, where the final shaping would make a minimal mess.
To say that we were nervous at this point was an understatement. Chris worried that the monster he had crafted might not gracefully replace the previous bowsprit, and his worrying made me anxious. There was only one way to put our nerves to bed, and that was to lift the bowsprit and see if it fit.
At first, it didn’t—but that was OK. We had anticipated an improper fit, which is why Chris had left enough material to continue taking it away, finely tuning the bowsprit’s shape to the boat itself. Using his wood planer and contractor square, he shaved another ¼ inch off the sides. He repeated the process about three times, with the fourth time being the golden ticket. The bowsprit slid with no resistance into place, with a very rewarding thunk into the samson post notches.
The bowsprit was at that point dry-fitted to Remedy,but the work was far from over. Chris had intentionally left the mating surface (where the samson posts and bowsprit made contact) proud so that he could strike a final line on the bowsprit once it was in place. This step in the process ensured that the bowsprit would be fully supported by the samson post while avoiding point-loading.
After this step was complete, it was time to install the hardware, which you might think would have been easier than everything else we had done so far. Nope.
By far, the most intimidating part of this project was drilling for the fasteners. Chris had thought about using a mobile drill press, but the holes he had to re-create in the bowsprit needed to accommodate the original hardware (like the pulpit), and those holes were not all uniform in where they went in and came out of the sprit.
For example: The two ½-inch bolts that go through the staysail chainplate went into the wood at about a 60-degree angle. So we took the process old-school and laid the hardware down on the bowsprit exactly where we wanted it. We then marked both sides of the hole, and used a handheld ½-inch drill to cut the holes in both sides until they connected in the middle. This technique ended up working pretty well—but there was a level of guesswork involved that, while it did not affect the quality of the finished product, just felt wrong to us after so much attention to detail in the project thus far.
Once all the holes had been drilled, Chris oversized them slightly and inlaid G10 (prefabricated epoxy-based fiberglass laminate) tubes for the bolts to go inside. Adding this upgrade to the original design meant the hardware didn’t need to be bedded because the G10 was epoxied in place. This upgrade to the design also meant the bolts couldn’t oval the wood over time, a problem that would lead to water ingress and put our friends right back where they had started.
After the tubes had been installed and bedded with thickened epoxy, the entire bowsprit was saturated in Smith’s Clear Penetrating Epoxy Sealer, and then finished with nine coats of Awlgrip’s Awlwood Clear Gloss. If we do say so ourselves, it looked quite lovely.
In the end—with all new hardware, a beautifully varnished bowsprit, and a bluewater cruising boat that was ready for adventure—our friends set a course south for Mexico in October 2021.
When we last checked, Remedy had covered more than 1,000 nautical miles, with the bowsprit we created proudly leading the way.
Marissa and Chris Neely are currently refitting their Cheoy Lee 41, Avocet, prepping to cast off their lines and go cruising.