voltage drop diagram 001_8571_0.jpg

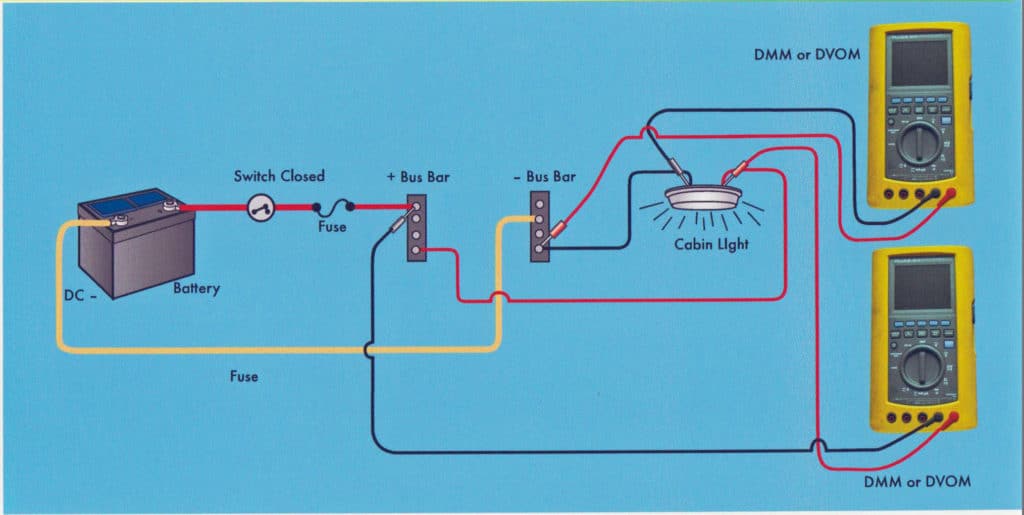
Using your multimeter (DVOM or digital volt ohm meter) to scope out excessive voltage drop. Diagram from one of the author’s books, Advanced Marine Electrics and Electronics Troubleshooting
We received a question from a reader the other day asking about how they might go about performing a voltage drop test for excessive voltage drop on their boat. Good question that needs a bit of explanation.
First of all, what is voltage drop and why do you need to care about performing a voltage drop test?
All of the electrical equipment on your boat is de3signed to operate within certain engineered voltage levels. Electronic equipment in particular is quite fussy about this matter. To that end, the ABYC describes two levels of acceptable voltage drop for on board electrical circuitry. Maximum levels of drop at 3% and 10% are identified. The specific circuits that 3% is allowed at are navigation lights, bilge blower circuits, panel board main feeder cables and mission critical electronic circuits. Its important to note that the standard actually states “electronics”. The intent of this is really mission critical as we have since defined. Truth is, if your DC powered AM/FM stereo/CD/IPOD/MP3 player has a bit of excessive voltage drop in its power supply, nobody really cares, and its not going to me life threatening. Your GPS or VHF radio on the other hand, could be a different story. You get the idea.
So, how do you the boat owner actually confirm whether you have too much voltage drop in a given circuit anyhow? Further, how do you actually pinpoint where in the circuit the excess exists?
In the diagram above I illustrate how to use your DVOM or multimeter in a seemingly strange way. Strange in part anyhow. To check for voltage drop simply check at the battery or source of power for a circuit by connecting you meter leads black to DC negative and red to DC positive and check the voltage. The meter needs to be set to the “DC Volts” setting and an appropriate voltage scale if your meter is not self-scaling. BTW, this all assumes that you have confirmed that your power supply is in good serviceable condition.
OK, once you have determined the voltage at the power source and written down the measured voltage (tens of a volt count here so record that), go out to the appliance in question and measure the available voltage at the piece of equipment.
Now, subtract the voltage value at the device from the voltage value at the source. Next, divide the difference by the measured voltage at the source. Move the decimal point two places to the right and you will have established the actual voltage drop in the circuit. If that value exceeds the allowable percentage value assigned by the ABYC Standards E-11 then the next step is to figure out where in the circuit the excess exists. That’s the point where you start using your multimeter in the strange way I mentioned here and as shown by tracing the meter leads in the lower meter illustration above. You’ll see that you have one meter lead connected to one end of the conductor in question and the other meter lead connected to the other end of the same conductor. Your meter is going to be set to the DC volts scale. I know that for many of you this seems just plain wrong, but believe me this works. The reading you get on your meter is the actual voltage “lost” in that leg of the circuit. Its going to be a pretty low value, typically in the tenths of volts, maybe even hundredths of volts. but by working your way through a circuit, wherever you get high readings when doing this is simply showing you where the excessive voltage drop may exist in the circuit.
For example, you could check the integrity of a battery cable connection to the battery post by checking between the actual post and the clamp around the post. I high reading indicates a poor quality connection between the clamp and the battery post. In the diagram above, a reading that was too high would indicate a wire that is undersized for the task at hand. Remember these facts relative to voltage drop, excessive drop can be caused by:
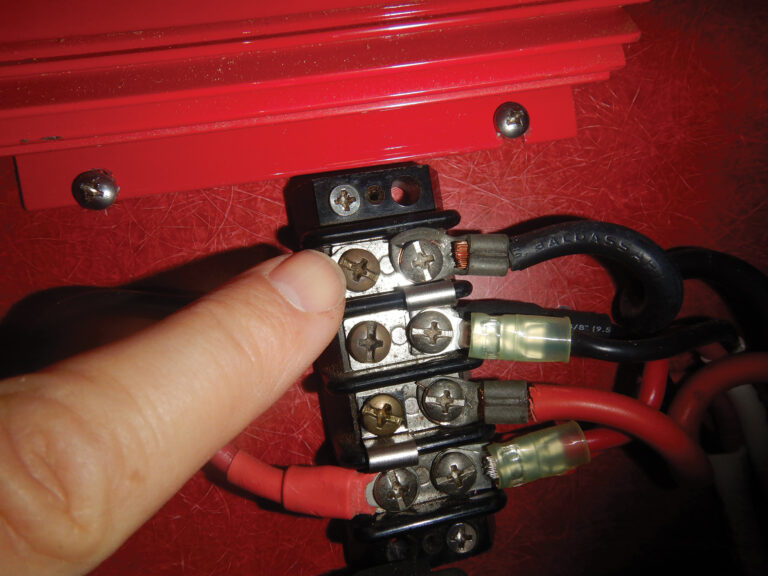
- Loose terminal connections.
- Excessive corrosion.
- Wiring that is undersized for the task.
Remember in all cases you must always confirm the integrity of the power source first. A bad battery will give you funky readings.


